Overview
| Item | Description |
|---|---|
| Purpose | Provide interface for teachers to hand-score assessment items |
| Communicates With | OpenAM Permissions ART TIS |
| Repository Location | https://github.com/SmarterApp/TDS_TestIntegrationSystem |
| Additional Documentation | README reportxml_os.xsd SAML Templates |
NOTE: The THSS database can reside on the same MSSQL Server that hosts the TIS databases.
Instructions
Create the THSS Database
- Create the following database on the MSSQL Server:
TSS
Create THSS Databse User Account(s)
- Create a user account (i.e. an MSSQL login or an Active Directory user) that has access to read/write (
db_readeranddb_writerroles) for the database cited above.
Create the TSS Database Schema
- Run the following scripts in order against the
TSSdatabase:- [\Path\to\THSS Repository]
DB\TSS\Tables\dbo.Items.sql - [\Path\to\THSS Repository]
DB\TSS\Tables\dbo.Dimensions.sql - [\Path\to\THSS Repository]
DB\TSS\Tables\dbo.ConditionCodes.sql - [\Path\to\THSS Repository]
DB\TSS\Tables\dbo.Students.sql - [\Path\to\THSS Repository]
DB\TSS\Tables\dbo.Teachers.sql - [\Path\to\THSS Repository]
DB\TSS\Tables\dbo.Tests.sql - [\Path\to\THSS Repository]
DB\TSS\Tables\dbo.Responses.sql - [\Path\to\THSS Repository]
DB\TSS\Tables\dbo.Assignments.sql - [\Path\to\THSS Repository]
DB\TSS\Tables\dbo.TeacherDistrictMap.sql - [\Path\to\THSS Repository]
DB\TSS\Tables\dbo.Logs.sql - [\Path\to\THSS Repository]
DB\TSS\Tables\dbo._dbLatency.sql - [\Path\to\THSS Repository]
DB\TSS\Tables\dbo.ActivityLog.sql - [\Path\to\THSS Repository]
DB\TSS\Tables\dbo.fn_SplitDelimitedString.sql - [\Path\to\THSS Repository]
DB\TSS\Tables\*.sqlNOTE: The intent of item 14 is to describe running all of the stored procedure scripts against theTSSdatabase.
- [\Path\to\THSS Repository]
Create AWS Instance
- Create server instance to host Teacher Hand Scoring System components
- AWS instance must be at least a t2.small
- Select an image with the Windows Server 2012 R2 Base 64-bit operating system
- Create an AWS security group with the following ports for inbound TCP traffic (can be done during instance creation):
- 1433
- 80
- 3389
- 443
Configure Windows AWS Instance
Configure the Web Server Components
- Connect to the Windows server via Remote Desktop
- Click on Server Manager (in toolbar next to Start Button)
- Click on Add Roles and Features
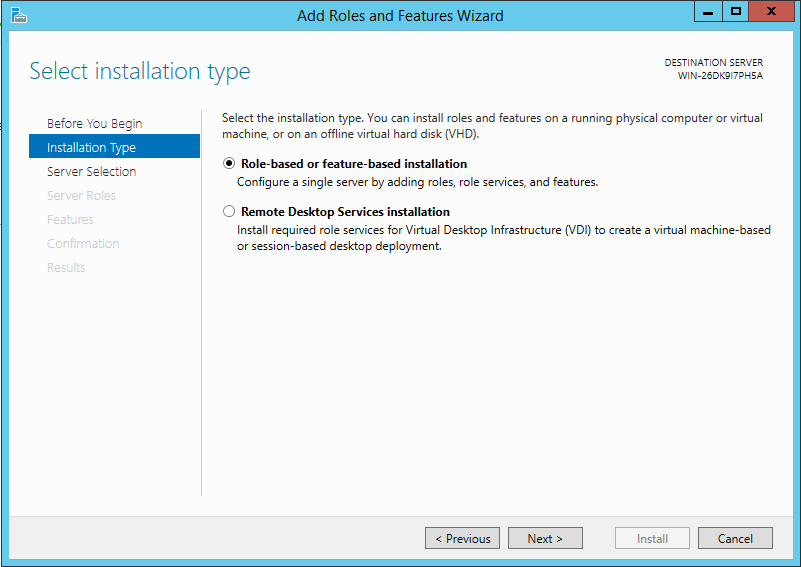
- Follow the wizard prompts:
-
Choose Role-based:
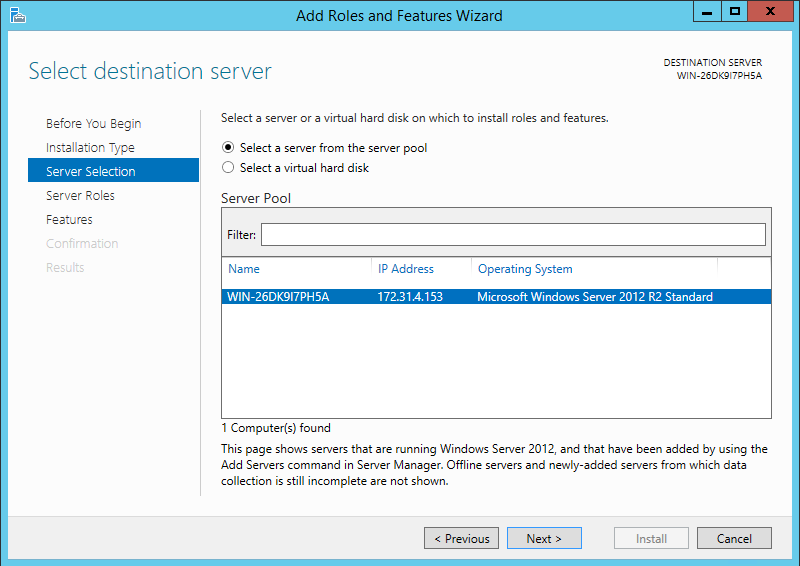
-
Leave select a server from the server pool selected (should show the name of the current server):
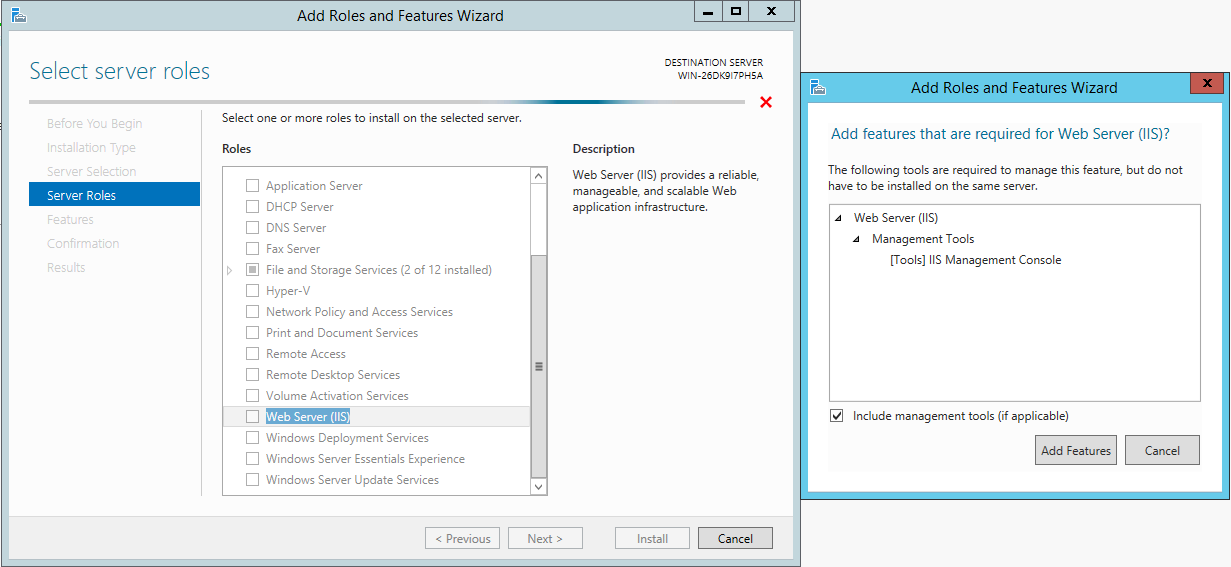
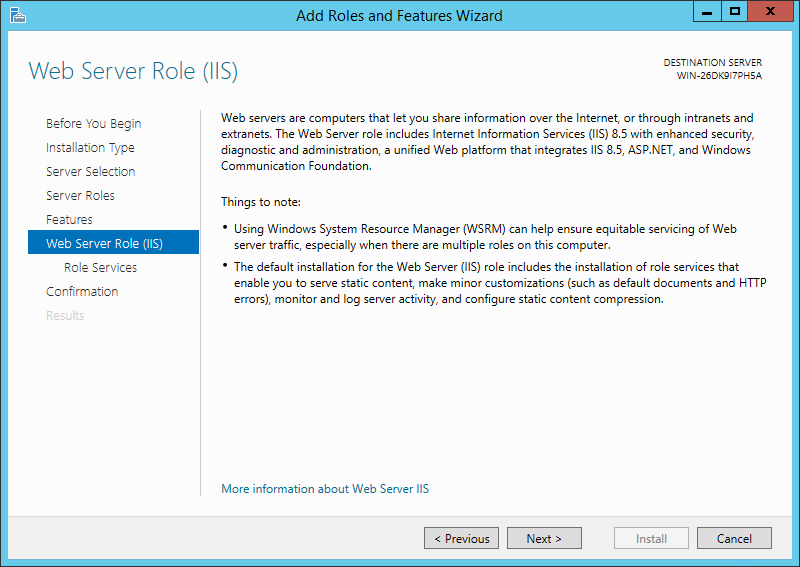
- Scroll down and check the Web Server (IIS) role:
- A dialog will appear (shown to the right in the screenshot) to confirm adding the feature. Click Add Features to confirm
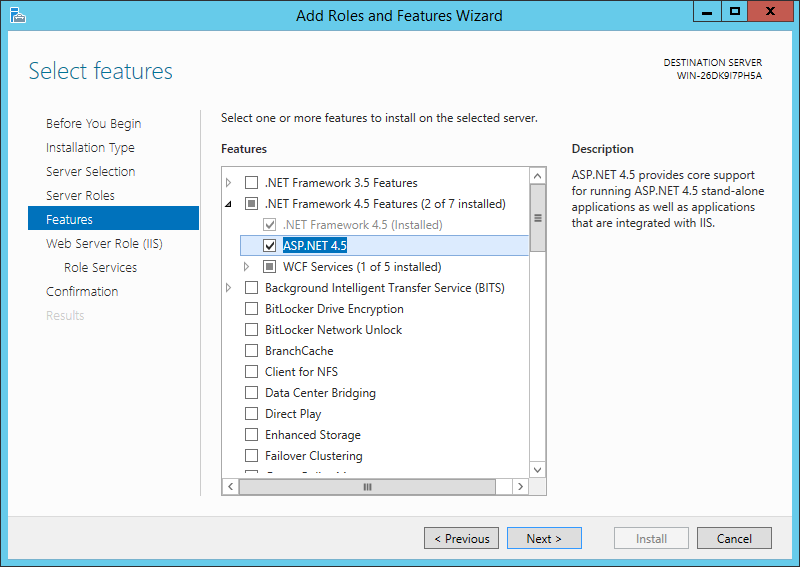
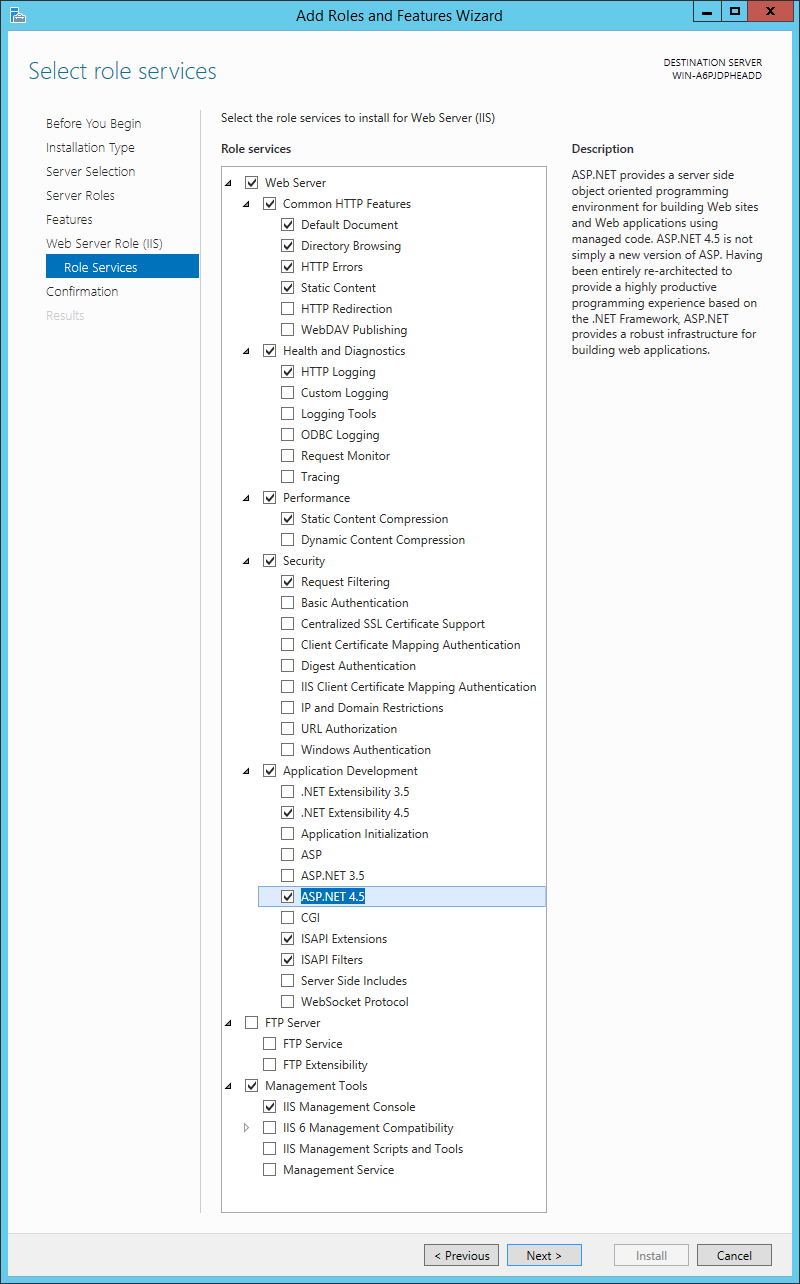
- Check the Application Development checkbox beneath the Web Server (IIS) role
- Choose to install ASP.NET 4.5
-
Expand the .NET Framework 4.5 Features and check the ASP.NET 4.5 checkbox:
-
Click Next on the information screen to continue with the server’s configuration:
-
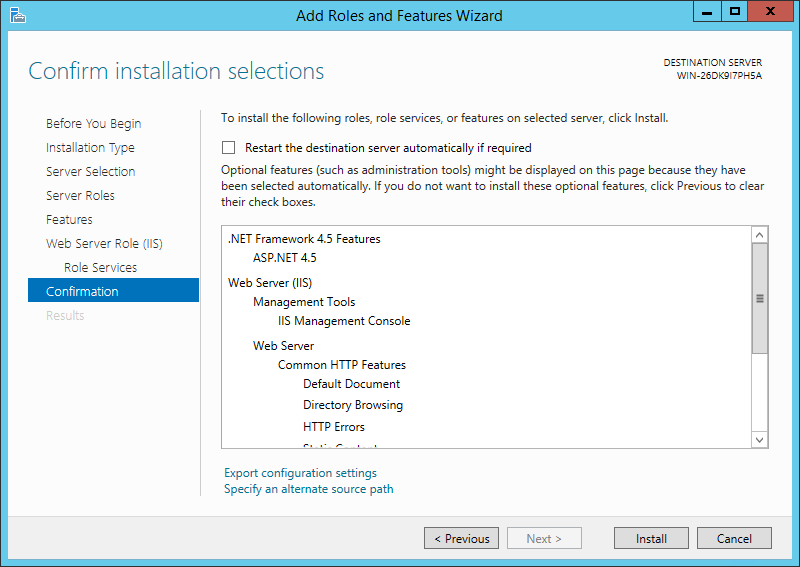
Review the selected features and click Next once satisfied:
-
Click Install to add the required features to this server:
- After the features have been installed, click Close to exit the wizard
Configure IIS Permissions for the Log Directory
IMPORTANT: Repeat the steps below for each log file directory. If you want applications to write to different log file directories, the IIS_IUSRS must be able to write to the desired directory/directories.
- Launch the File Explorer
- Navigate to the directory where the application(s) is/are configured to write log entires
- Refer to the
LogFilePath valuein theweb.config - Example: C:\inetpub\logs
- Refer to the
- Right-click on the directory and choose Properties
- Click on the Security tab
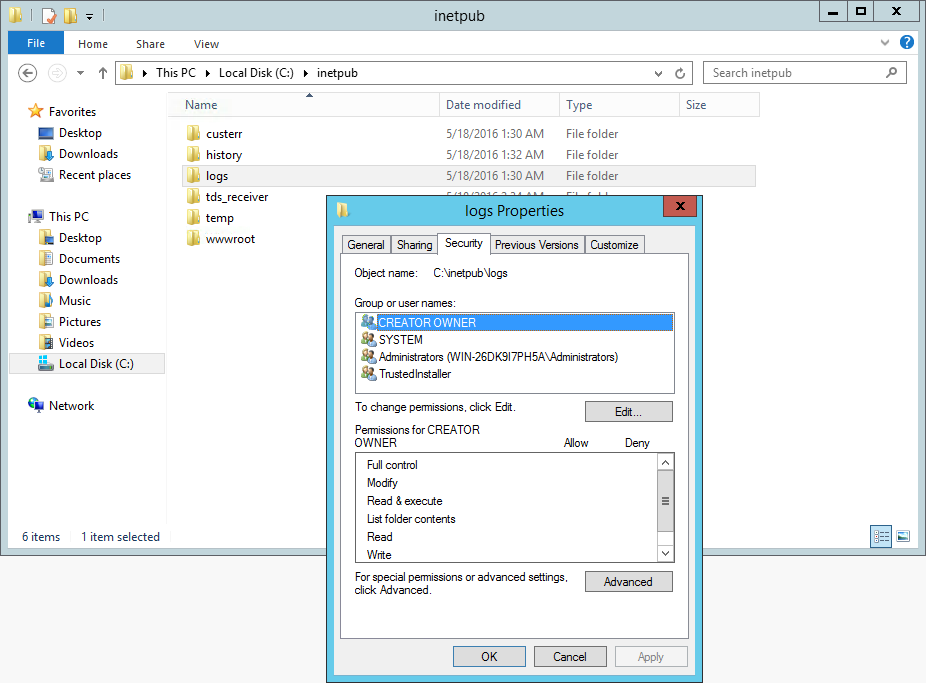
- Click the Edit button
- Click the Add… button
- Enter IIS_IUSRS in the Enter object names to select field and click Check Names
- The IIS_IUSRS should be updated to include the server name, indicating the user group was found.
- An example of the result after the Check Names button is clicked:
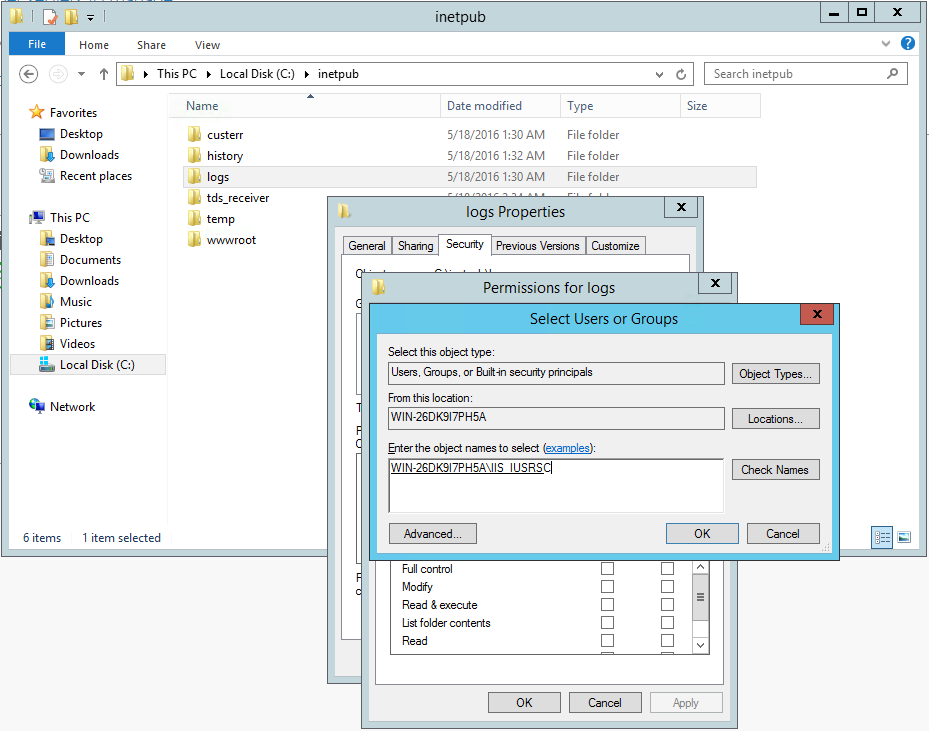
- Click OK
- Give the IIS_IUSRS Write permission to the log directory:
- Scroll down in the list of available permissions
- Check the box next to Write
- An example of granting Write permission to the IIS_IUSRS group:
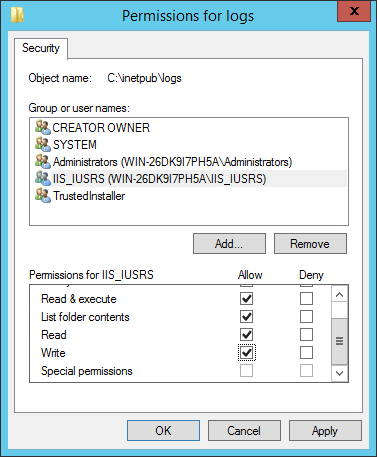
- Click OK
- Click OK
Add Inbound and Outbound Firewall Rules to Allow Communicating with SQL Server
- Launch the Windows Firewall with Advanced Security pane
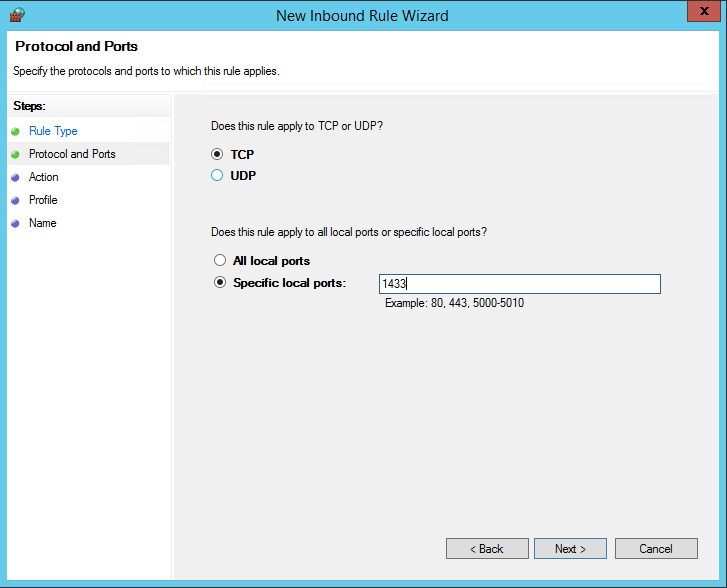
- While viewing the Inbound Rules, click on New Rule…
-
Set the Rule Type to Port:

-
Choose TCP and provide the port number (MSSQL Server default port is 1433)
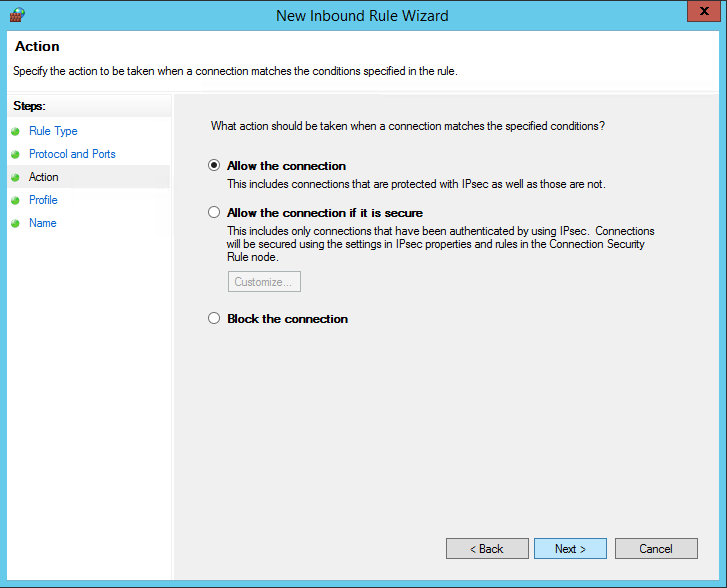
-
Leave Allow the Connection selected:
-
Leave all checkboxes checked on the Apply Rule screen:
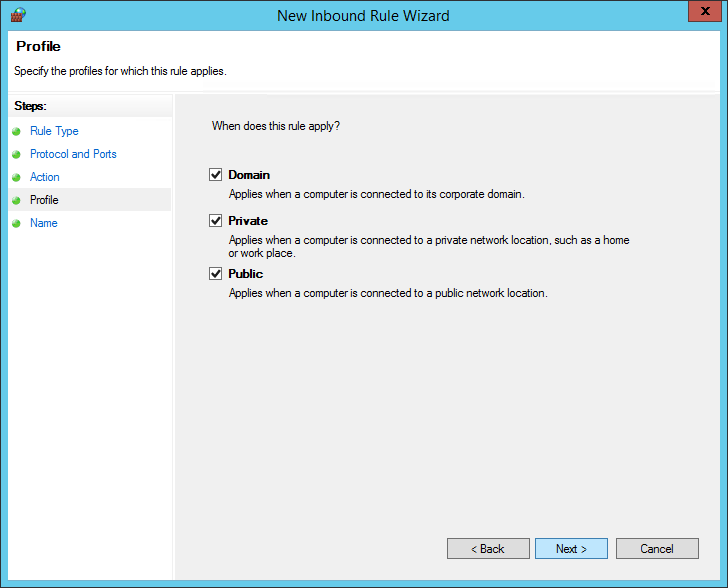
-
Provide a name for the rule and click the Finish button:

- Repeat the steps above, creating an Outbound Rule for the same port.
Deploy the Teacher Hand Scoring System
Build the Test Hand Scoring System
- Clone the TDS_TeacherHandScoringSystem repository to a machine that can build .NET applications:
git clone https://github.com/SmarterApp/TDS_TestIntegrationSystem.git
- Launch Visual Studio
-
Open the
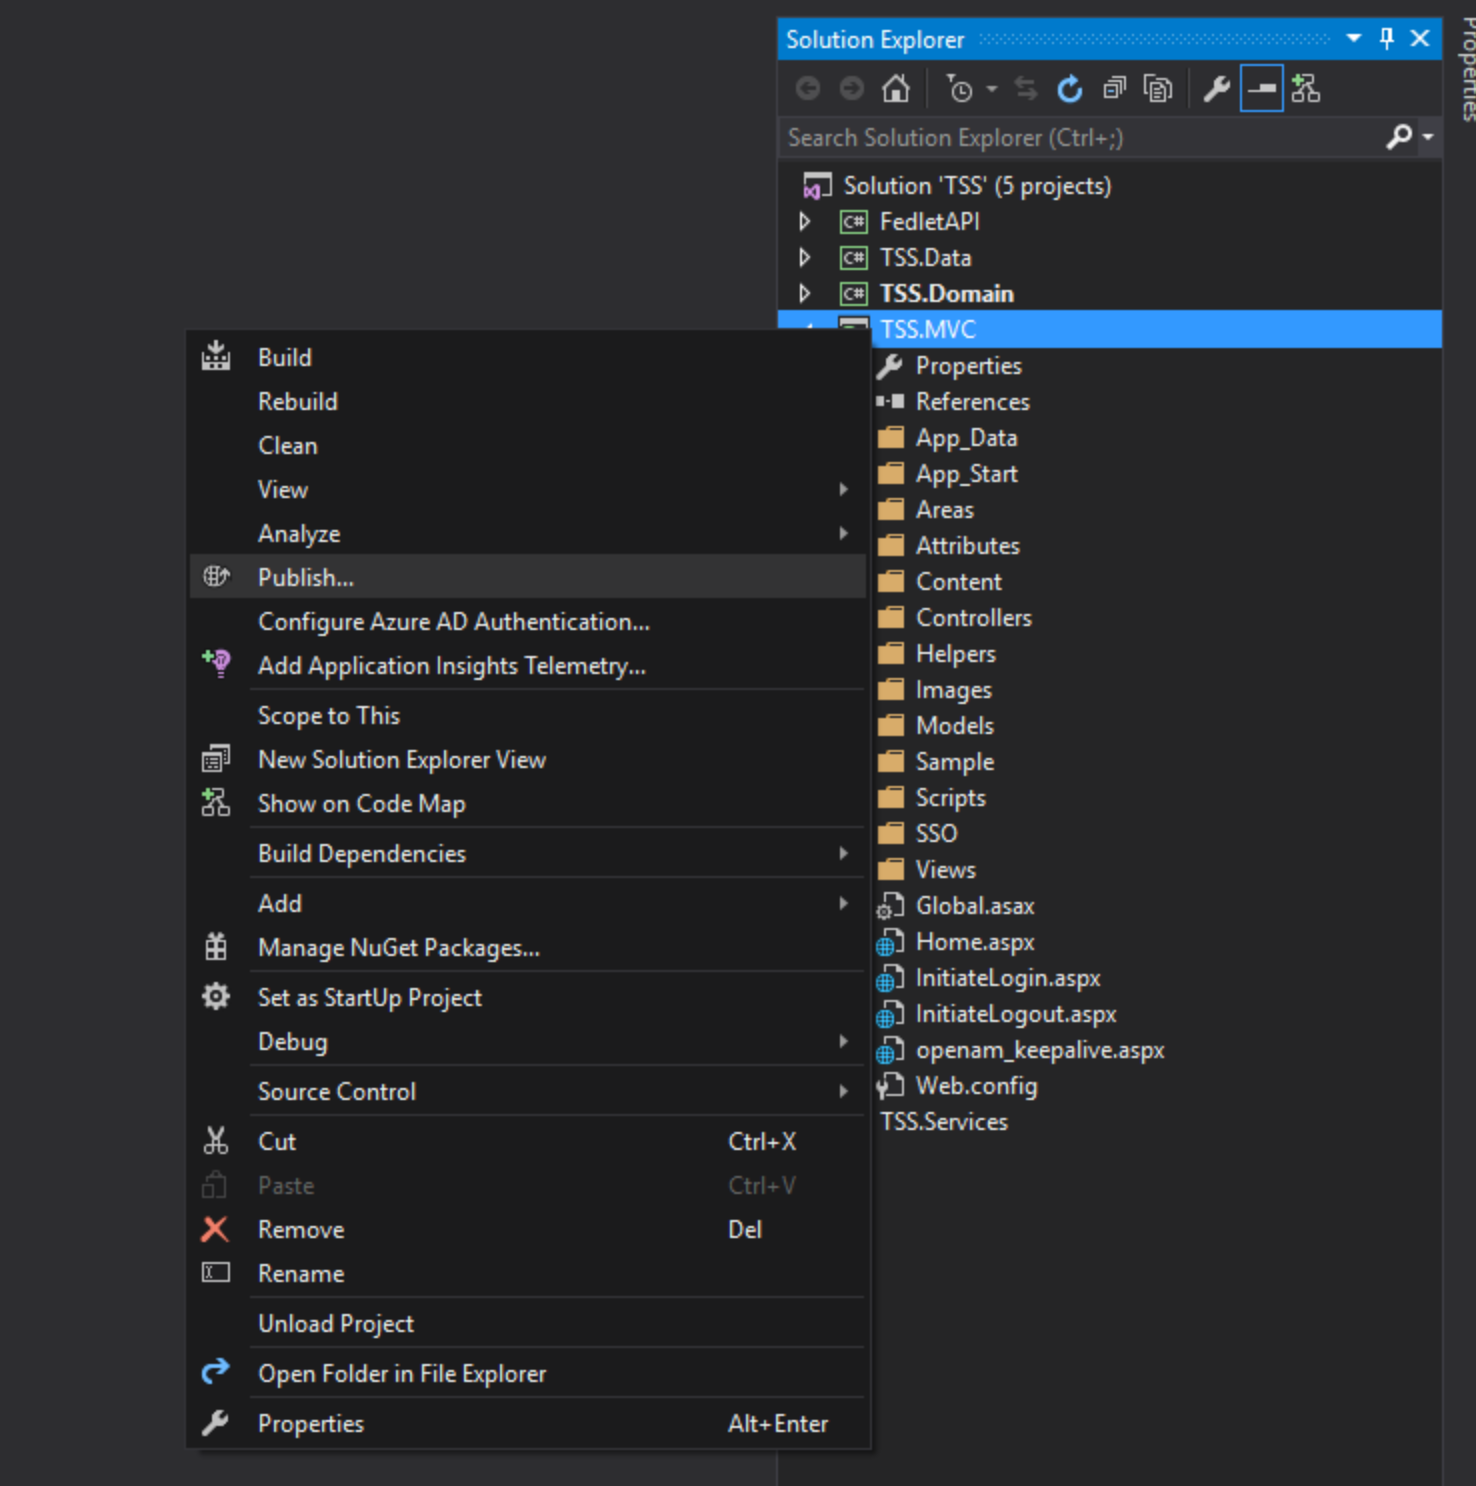
Src/TSS.sln - In Visual Studio, right-click on the Solution and choose Publish…
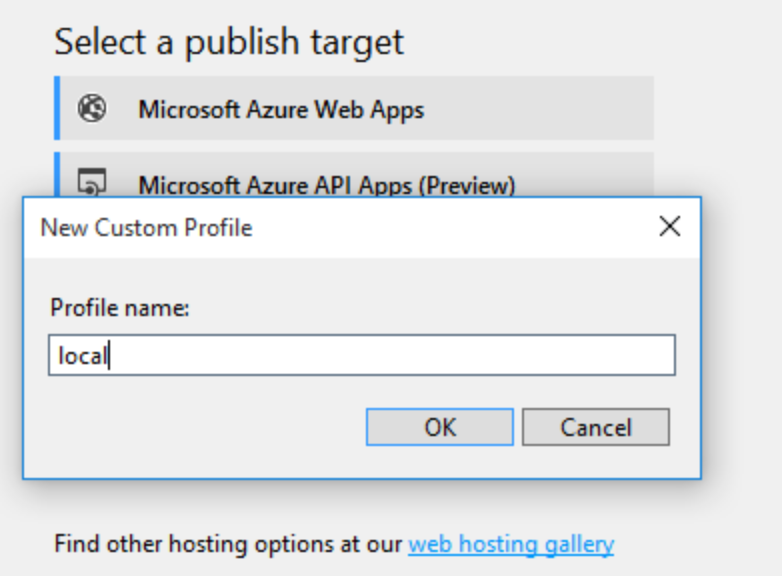
- Choose Custom profile and provide a name:

- Provide a path to where the build results should be deployed
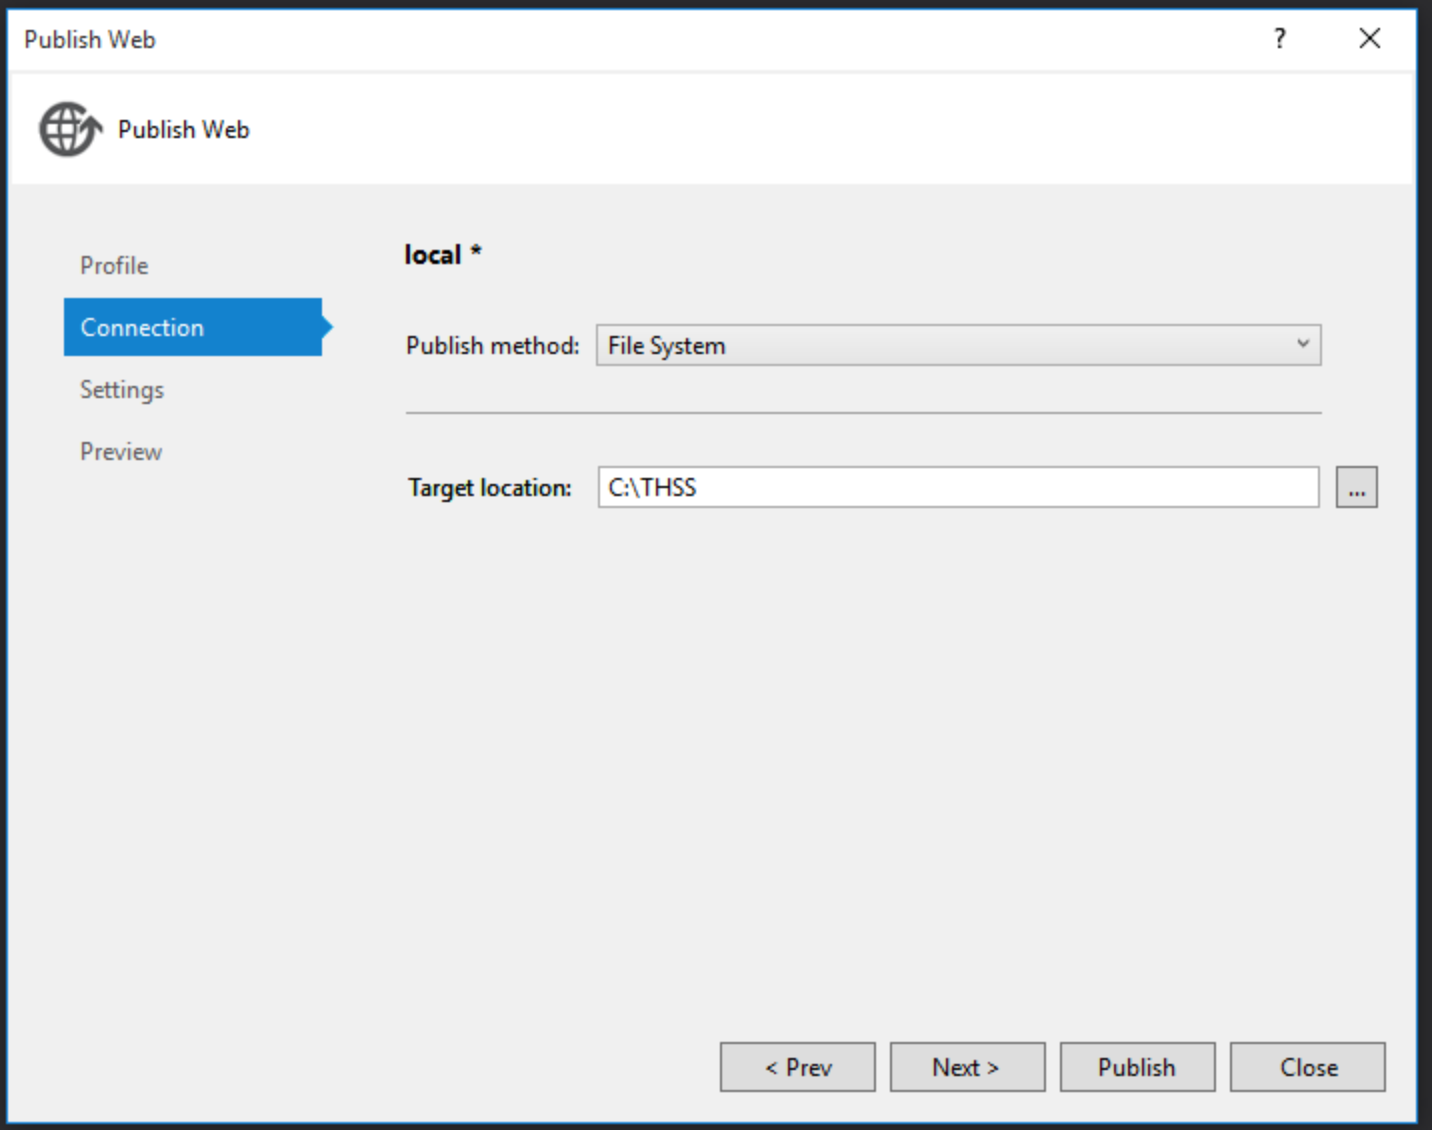
- Choose Relase - Any CPU from the Configuration
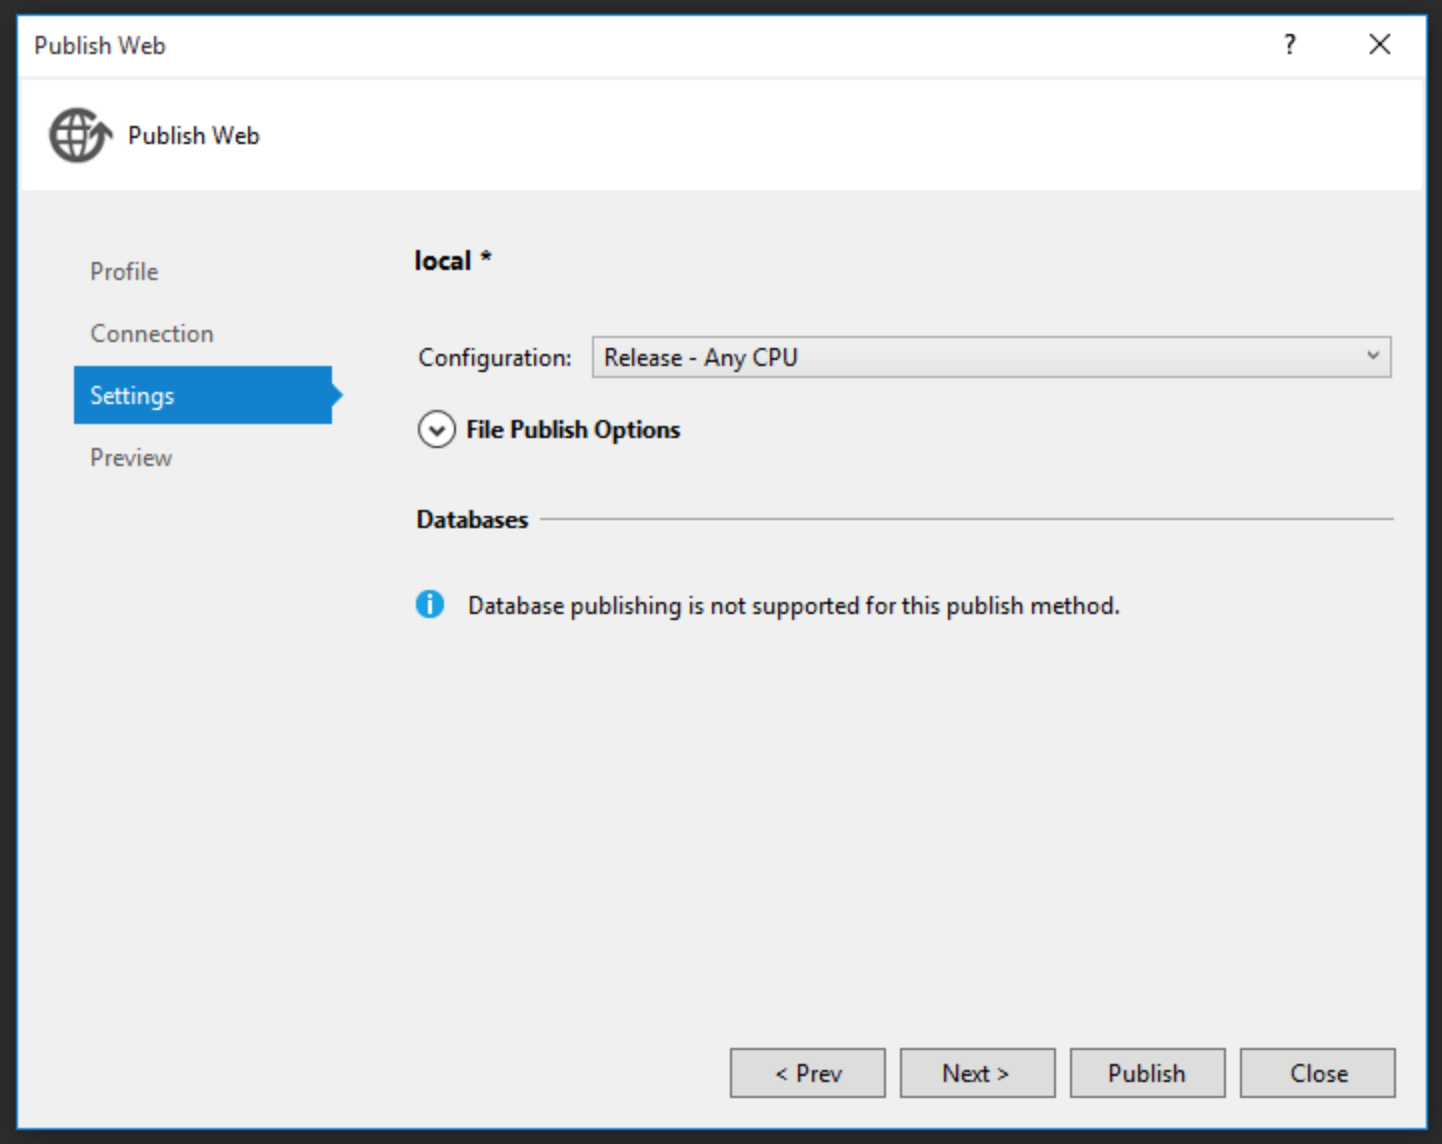
- When satisifed with all settings, click Publish

Deploy the THSS Component
- Connect to the AWS Windows server via RDP
- Create a directory where the THSS component will be deployed
- The THSS Component is a web application, thus must be accessible by IIS
- Example:
C:\inetpub\thss
- From the machine where the THSS web application was built, copy the entire contents of the directory where the Publish wizard deployed the component into the directory created in the previous step.
Configure a THSS Website in IIS
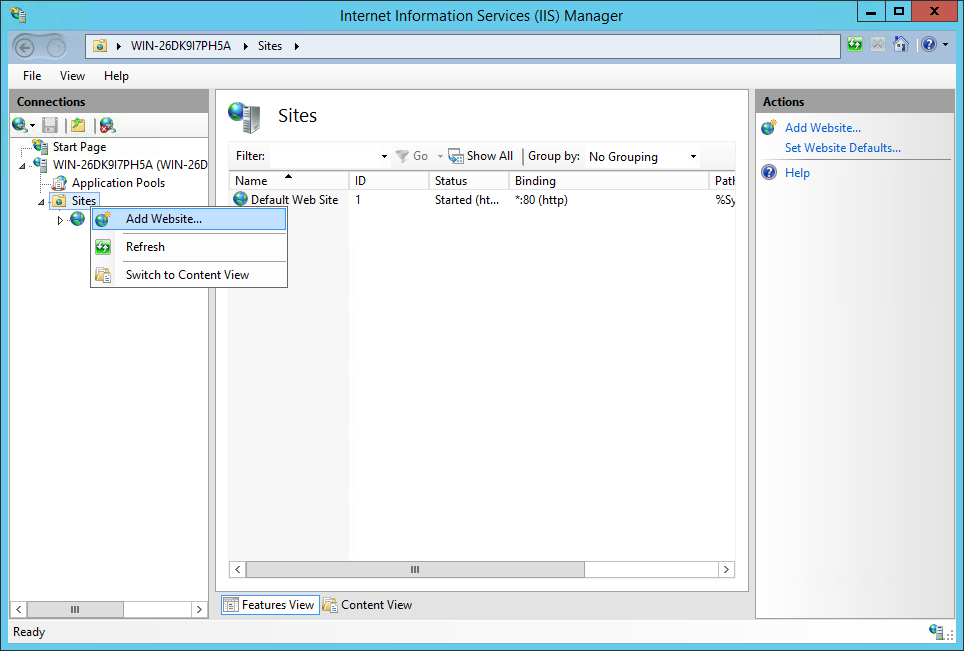
- Launch the Internet Information Services Manager
- Click Start button in lower-left corner (leftmost control on toolbar)
- Click the down arrow (if the Internet Information Services Manager does not appear)
- Search for and launch the Internet Information Services Manager
- Right click on the Default Web Site
- Choose Manage Website…
- Choose Stop
- Right click on Sites and choose Add Website…
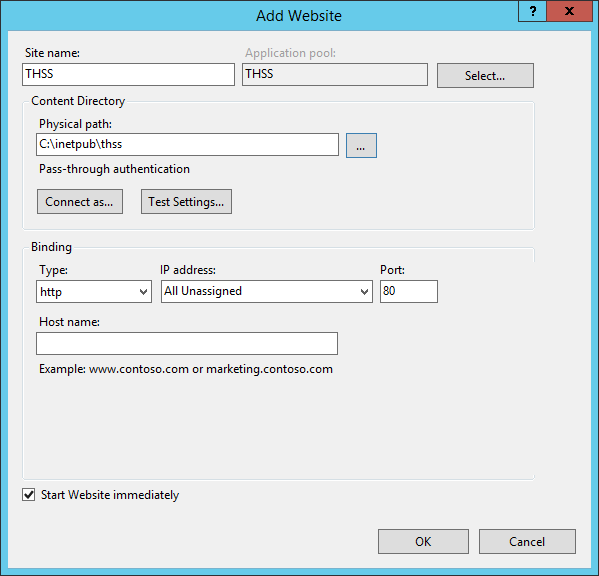
- Provide the following details in the dialog that appears:
- Site name: [Choose a meaningful name]
- Application Pool: [Choose an exisitng Application Pool, or allow IIS to create a new Application Pool for this site (recommended)]
- Physical Path: [The path to where the THSS web application components have been deployed]
- Binding: [Choose an available port]
- Host name: [OPTIONAL: Provide a host name]
- Screenshot showing example values for the TDS Receiver website:
Configure the THSS Application
- Navigate to [\Path\to\THSS web application]
\App_Data- Example: C:\inetpub\thss\App_Data
Get IDP Metadata
- Create a new file named exactly
idp.xmland save it to the [\Path\to\THSS web application]\App_Datadirectory - Navigate to
https://[FQDN or IP address of OpenAM server]/auth/saml2/jsp/exportmetadata.jsp?realm=/sbac- Example:
https://sso-deployment.sbtds.org/auth/saml2/jsp/exportmetadata.jsp?realm=/sbac
- Example:
- Right-click on the resulting XML and choose View source
- Copy the entire content of the results into [\Path\to\THSS web application]
\App_Data\idp.xmland saveidp.xml.
Configure the fedlet.cot File
- Open [\Path\to\THSS web application]
\App_Data\fedlet.cotin an editor and update the following:
cot-name=[Name of the Circle of Trust in OpenAM; use sbac if following this guide]
sun-fm-cot-status=Active
sun-fm-trusted-providers=https://[FQDN or IP address of OpenAM server]/auth, [Entity ID for THSS in OpenAM, use thss if following this guide]
sun-fm-saml2-readerservice-url=
sun-fm-saml2-writerservice-url=
- Example of configured
fedlet.cot:
cot-name=sbac
sun-fm-cot-status=Active
sun-fm-trusted-providers=https://sso-deployment.sbtds.org:443/auth, thss
sun-fm-saml2-readerservice-url=
sun-fm-saml2-writerservice-url=
Configure the idp-extend.xml File
- Open the [\Path\to\THSS web application]
\App_Data\idp-extended.xmlin an editor - Update the following configuration:
entityID=“https://[FQDN or IP address of OpenAM server]/auth”
- Example of configured
idp-extended.xml:
<?xml version="1.0" encoding="UTF-8" standalone="yes"?>
<EntityConfig entityID="https://sso-deployment.sbtds.org:443/auth" hosted="0" xmlns="urn:sun:fm:SAML:2.0:entityconfig">
    <IDPSSOConfig>
        <Attribute name="description">
            <Value/>
        </Attribute>
        <Attribute name="cotlist">
            <Value>sbac</Value>
        </Attribute>
        <Attribute name="wantArtifactResolveSigned">
            <Value></Value>
        </Attribute>
        <Attribute name="wantLogoutRequestSigned">
            <Value></Value>
        </Attribute>
        <Attribute name="wantLogoutResponseSigned">
            <Value></Value>
        </Attribute>
        <Attribute name="wantNameIDEncrypted">
            <Value></Value>
        </Attribute>
    </IDPSSOConfig>
</EntityConfig>
Configure the sp.xml File
- Open the [\Path\to\THSS web application]
\App_Data\sp.xmlin an editor - Update the following configuration:
- Replace all instances of
FEDLET_DEPLOY_URIwith the [the protocol/scheme]://[FQDN or IP address of the THSS website]
- Replace all instances of
- Example of configured
sp.xml:
<EntityDescriptor entityID="thss" xmlns="urn:oasis:names:tc:SAML:2.0:metadata">
    <SPSSODescriptor AuthnRequestsSigned="false" WantAssertionsSigned="false" protocolSupportEnumeration="urn:oasis:names:tc:SAML:2.0:protocol">
        <SingleLogoutService Binding="urn:oasis:names:tc:SAML:2.0:bindings:HTTP-Redirect" Location="http://54.200.42.254/InitiateLogout.aspx" ResponseLocation="http://54.200.42.254/InitiateLogout.aspx"/>
        <SingleLogoutService Binding="urn:oasis:names:tc:SAML:2.0:bindings:HTTP-POST" Location="http://54.200.42.254/InitiateLogout.aspx" ResponseLocation="http://54.200.42.254/InitiateLogout.aspx"/>
        <SingleLogoutService Binding="urn:oasis:names:tc:SAML:2.0:bindings:SOAP" Location="http://54.200.42.254/InitiateLogout.aspx"/>
        <NameIDFormat>urn:oasis:names:tc:SAML:2.0:nameid-format:transient</NameIDFormat>
        <AssertionConsumerService isDefault="true" index="0" Binding="urn:oasis:names:tc:SAML:2.0:bindings:HTTP-POST" Location="http://54.200.42.254/InitiateLogin.aspx"/>
        <AssertionConsumerService index="1" Binding="urn:oasis:names:tc:SAML:2.0:bindings:HTTP-Artifact" Location="http://54.200.42.254/InitiateLogin.aspx"/>
    </SPSSODescriptor>
</EntityDescriptor>
Configure the sp-extended.xml File
- Open the [\Path\to\THSS web application]
\App_Data\sp-extended.xmlin an editor - Update the following configuration:
- Replace the
FEDLET_ENTITY_IDwith [Entity ID for THSS in OpenAM, use thss if following this guide] - Replace the
CIRCLE_OF_TRUST_NAMEwith [Name of Circle of Trust from OpenAM; use sbac if following this guide]
- Replace the
- Example of configured
sp-extended.xml:
<EntityConfig xmlns="urn:sun:fm:SAML:2.0:entityconfig" xmlns:fm="urn:sun:fm:SAML:2.0:entityconfig" hosted="1" entityID="thss">
    <SPSSOConfig metaAlias="/sp">
        <Attribute name="description">
            <Value></Value>
        </Attribute>
        <Attribute name="signingCertAlias">
            <Value></Value>
        </Attribute>
        <Attribute name="encryptionCertAlias">
            <Value></Value>
        </Attribute>
        <Attribute name="basicAuthOn">
            <Value>false</Value>
        </Attribute>
        <Attribute name="basicAuthUser">
            <Value></Value>
        </Attribute>
        <Attribute name="basicAuthPassword">
            <Value></Value>
        </Attribute>
        <Attribute name="autofedEnabled">
            <Value>false</Value>
        </Attribute>
        <Attribute name="autofedAttribute">
            <Value></Value>
        </Attribute>
        <Attribute name="transientUser">
            <Value>anonymous</Value>
        </Attribute>
        <Attribute name="spAdapter">
            <Value></Value>
        </Attribute>
        <Attribute name="spAdapterEnv">
            <Value></Value>
        </Attribute>
        <Attribute name="spAccountMapper">
            <Value>com.sun.identity.saml2.plugins.DefaultLibrarySPAccountMapper</Value>
        </Attribute>
        <Attribute name="spAttributeMapper">
            <Value>com.sun.identity.saml2.plugins.DefaultSPAttributeMapper</Value>
        </Attribute>
        <Attribute name="spAuthncontextMapper">
            <Value>com.sun.identity.saml2.plugins.DefaultSPAuthnContextMapper</Value>
        </Attribute>
        <Attribute name="spAuthncontextClassrefMapping">
            <Value>urn:oasis:names:tc:SAML:2.0:ac:classes:PasswordProtectedTransport|0|default</Value>
        </Attribute>
        <Attribute name="spAuthncontextComparisonType">
           <Value>exact</Value>
        </Attribute>
        <Attribute name="attributeMap">
           <Value>*=*</Value>
        </Attribute>
        <Attribute name="saml2AuthModuleName">
           <Value></Value>
       </Attribute>
       <Attribute name="localAuthURL">
           <Value></Value>
       </Attribute>
       <Attribute name="intermediateUrl">
           <Value></Value>
       </Attribute>
       <Attribute name="defaultRelayState">
           <Value></Value>
       </Attribute>
       <Attribute name="assertionTimeSkew">
           <Value>300</Value>
       </Attribute>
       <Attribute name="wantAttributeEncrypted">
           <Value></Value>
       </Attribute>
       <Attribute name="wantAssertionEncrypted">
           <Value></Value>
       </Attribute>
       <Attribute name="wantNameIDEncrypted">
           <Value></Value>
       </Attribute>
       <Attribute name="wantArtifactResponseSigned">
           <Value></Value>
       </Attribute>
       <Attribute name="wantPOSTResponseSigned">
           <Value></Value>
       </Attribute>
       <Attribute name="wantLogoutRequestSigned">
           <Value></Value>
       </Attribute>
       <Attribute name="wantLogoutResponseSigned">
           <Value></Value>
       </Attribute>
       <Attribute name="wantMNIRequestSigned">
           <Value></Value>
       </Attribute>
       <Attribute name="wantMNIResponseSigned">
           <Value></Value>
       </Attribute>
       <Attribute name="cotlist">
           <Value>sbac</Value>
       </Attribute>
       <Attribute name="saeAppSecretList">
       </Attribute>
       <Attribute name="saeSPUrl">
           <Value></Value>
       </Attribute>
       <Attribute name="saeSPLogoutUrl">
       </Attribute>
       <Attribute name="ECPRequestIDPListFinderImpl">
           <Value>com.sun.identity.saml2.plugins.ECPIDPFinder</Value>
       </Attribute>
       <Attribute name="ECPRequestIDPList">
           <Value></Value>
       </Attribute>
       <Attribute name="enableIDPProxy">
           <Value>false</Value>
       </Attribute>
       <Attribute name="idpProxyList">
           <Value></Value>
       </Attribute>
       <Attribute name="idpProxyCount">
           <Value>0</Value>
       </Attribute>
       <Attribute name="useIntroductionForIDPProxy">
           <Value>false</Value>
       </Attribute>
       <Attribute name="relayStateUrlList">
       </Attribute>
    </SPSSOConfig>
</EntityConfig>
Configure the OpenAMSites.xml File
- Open the [\Path\to\THSS web application]
\App_Data\OpenAMSites.xmlin an editor - Update the following configuration:
Contentselement:ForState=[Use SBAC or SBAC_PT]
ClientSiteelement:Url=[*The scheme/protocol]://[The FQDN or IP address of the ART server]
- Example of configured
OpenAMSites.xml:
<?xml version="1.0" encoding="utf-8" ?>
<!-- This configuration file provides links for the drop-down navigation in THSS. -->
<!-- The state name must match the state specified in the settings.config document -->
<Contents>
  <Content ForState="SBAC" ContentSectionName="TssSubSites">
    <ClientSites>
      <ClientSite>
        <ClientID>Tide</ClientID>
        <Description>ART</Description>
        <Url>http://54.186.87.166:8080</Url>
      </ClientSite>
    </ClientSites>
  </Content>
</Contents>
Configure the DataDistribution.config File
- Open the [\Path\to\THSS web application]
\App_Data\DataDistribution.configin an editor - Update the following configuration:
ConnectionStringselement:DefaultConnection=[Connection information to communicate with the MSSQL Server that supports the TSS database]Data Source=[The FQDN or IP address of the MSSQL Server that supports the TSS database]Initial Catalog=[The name of the database that supports the TIS Service; use TSS if following this guide]User id=[The user account that has read/write access to the TSS database]Password=[The password for the user account configured in the User id section of the connection string]
- NOTE: The
Districtselement can be ignored; it is only used when data is partitioned by District (that is, in the case when each District has its own database).
- Example of configured
DataDistribution.config:
<?xml version="1.0"?>
<TSSDataDistribution>
    <ConnectionStrings>
        <ConnectionString name="DefaultConnection" connectionString="Data Source=tis-deployment2.cugsexobhx8t.us-west-2.rds.amazonaws.com;Initial Catalog=TSS;User id=remoteuser;Password=[redacted]" default="true">
            <Districts>
                <add id="1001"/>
                <add id="1002"/>
                <!-- This section is redundant and added for example only as all districts not explicitly mentioned in another connection string are added to the default configuration. -->
            </Districts>
        </ConnectionString>
    </ConnectionStrings>
</TSSDataDistribution>
Configure the settings.config File
- Open the [\Path\to\THSS web application]
\App_Data\settings.configin an editor - Update the following configuration:
appSettingselement:ART_API_REST_API_BASE_URL=[*The scheme/protocol]://[The FQDN or IP address of the ART server]/restART_API_URL=[*The scheme/protocol]://[The FQDN or IP address of the ART server]/rest/userART_API_CLIENT=[Assessment publisher name; either SBAC_PT or SBAC]ART_OAUTH_URL=https://[FQDN or IP address of the OpenAM server]/auth/oauth2/access_token?realm=/sbacART_OAUTH_PASSWORD_GRANTTYPE=[Boolean for determining if OAuth request should use the password grant type]ART_OAUTH_USERNAME=[User account that exists in OpenDJ]ART_OAUTH_REQUIRED=[Boolean for determining if OAuth is required]ART_OAUTH_PASSWORD=[Password for user account defined in ART_OAUTH_USERNAME]ART_OAUTH_SECRET=[Client secret for ART_OAUTH_CLIENTID]ART_OAUTH_CLIENTID=[The OAuth client name for the Monitoring and Alerting (MnA) component; can use a “common” OAuth client name, e.g. one OAuth client for multiple components]IGNORE_TENANCY_CHAINS=[Boolean for determining if user tenancy chains should be evaluated]SAML_OWNER_PREFIX=sbacSAML_SESSIONREFRESH_URL=https://[FQDN or IP address of OpenAM server]/auth/identity/attributes?refresh=trueSAML_REDIRECT=[*The scheme/protocol]://[The FQDN or IP address of the THSS website]PERMISSIONS_SCHEMA_URL=[*The scheme/protocol]://[The FQDN or IP address of the Permissions application]/rest/role?component=Teacher Hand Scoring SystemLOAD_PERMISSIONS_FROM_LOCAL=[*Boolean for determining if permission sets should be loaded from local files. Set to False8]ART_ENTITIES_DATA_CACHING_DAYS=[Length of time (in days) to cache ART entity, minimizing number of calls to ART]ART_SCORER_DATA_CACHING_MINS=[Length of time (in minutes) to cache ART scorer data, minimizing number of calls to ART]IRIS_OPEN_SOURCE=[Set to True]IRIS_VENDOR_ID=[GUID representing the IRiS vendor]IRIS_ROOT_URL=[*The scheme/protocol]://[The FQDN or IP address of the IRiS application]/IRiS/IRISBlackbox_ROOT_URL=[*The scheme/protocol]://[The FQDN or IP address of the IRiS blackbox application]/IRiS/IRIS_PEM_LOCATION=[Leave this field blank/empty]IRIS_KEY_EXPIRE_MINUTES=[Number of minutes before the IRiS keys expire]USER_GUIDE_LOCATION=[Path to TSS_User_Guide.docx]SCORE_SUBMITTED_MESSAGE=[Message returned when a score is submitted]ACCESS_DENIED=[Message returned when access is denied]SHOW_STATUS=[Boolean to determine if status should be displayed]MinLogLevel=[Minimum level for which logs should be created]COOKIE_TIMEOUT_MINS=[Number of minutes before THSS cookies are expired]
- Example of configured
settings.configfile:
<?xml version="1.0"?>
    <appSettings>
        <add key="webpages:Version" value="2.0.0.0" />
        <add key="webpages:Enabled" value="false" />
        <add key="PreserveLoginUrl" value="true" />
        <add key="ClientValidationEnabled" value="false" />
        <add key="UnobtrusiveJavaScriptEnabled" value="false" />

        <add key="EMAIL_AS_UUID" value="true"/>
        <add key="ART_API_REST_API_BASE_URL" value="http://54.186.87.166:8080/rest" />
        <add key="ART_API_URL" value="http://54.186.87.166:8080/rest/user" />
        <add key="ART_API_CLIENT" value="SBAC_PT"/>
        <add key="ART_OAUTH_URL" value="https://sso-deployment.sbtds.org:443/auth/oauth2access_token?realm=/sbac"/>
        <add key="ART_OAUTH_PASSWORD_GRANTTYPE" value="true" />
        <add key="ART_OAUTH_USERNAME" value="prime.user@example.com"/>
        <add key="ART_OAUTH_REQUIRED" value="true"/>
        <add key="ART_OAUTH_PASSWORD" value="[redacted]"/>
        <add key="ART_OAUTH_SECRET" value="[redacted]"/>
        <add key="ART_OAUTH_CLIENTID" value="pm"/>


        <add key="IGNORE_TENANCY_CHAINS" value="False"/>
        <add key="SAML_OWNER_PREFIX" value="sbac"/>
        <add key="SAML_SESSIONREFRESH_URL" value="https://sso-deployment.sbtds.org/auth/identity/attributes?refresh=true"/>
        <add key="SAML_REDIRECT" value="http://54.200.42.254/"/>
        <add key="PERMISSIONS_SCHEMA_URL" value="http://54.213.111.234:8080/rest/role?component=Teacher Hand Scoring System"/>

        <!-- It is possible to load a pre-configured set of permissions from below instead of using the permissions API. Set LOAD_PERMISSIONS_FROM_LOCAL to true and load a role.json file in the App_Config folder. See Permissions API for JSON structure. -->
        <add key="LOAD_PERMISSIONS_FROM_LOCAL" value="false"/>
        <add key="ART_ENTITIES_DATA_CACHING_DAYS" value="1" />
        <add key="ART_SCORER_DATA_CACHING_MINS" value="30"/>
        <add key="IRIS_OPEN_SOURCE" value="True"/>
        <add key="IRIS_VENDOR_ID" value="2B3C34BF-064C-462A-93EA-41E9E3EB8333" />
        <add key="IRIS_ROOT_URL" value="http://54.186.182.136:8080/IRiS/"/>
        <add key="IRISBlackbox_ROOT_URL" value="http://54.186.182.136:8080/IRiS/"/>

        <add key="IRIS_PEM_LOCATION" value="" />
        <add key="IRIS_KEY_EXPIRE_MINUTES" value="30" />

        <add key="USER_GUIDE_LOCATION" value="/content/UserGuide/TSS_User_Guide.docx"/>
        <add key="SCORE_SUBMITTED_MESSAGE" value="The score has been saved." />
        <add key="ACCESS_DENIED" value="You are not Authorized User"/>
        <add key="SHOW_STATUS" value="true" />

        <!-- Minimum level for which logs should be created -->
        <add key="MinLogLevel" value="Info" />
        <add key="COOKIE_TIMEOUT_MINS" value="30"/>
    </appSettings>
Permission Settings
- Log into the Permissions Application in order to create the new Component and Permissions.
- Create a new Component named
Teacher Hand Scoring System - Create the following permissions for the newly created
Teacher Hand Scoring SystemComponent:Can See All ItemsCan See Own Items
- Grant Roles access to the newly created Permissions. The following mapping is a good starting point:
Can See All Items->AdministratorCan See Own Items->Administrator,Test Administrator
OpenAM Updates
- In order to get SAML working and enable logging into THSS via the Signle Sign-On, you will need to add THSS as a Service Provider in OpenAM.
- Log into the OpenAM administration console located at:
- https://[Base OpenAM URL]/auth/console?realm=/
- The default username is
amadmin - Click on the
Federationtab - In the
Entity Providerssection of the page, clickImport Entity... - Enter the following:
- Change Realm to
/sbac - Select
Filefor theWhere does the metadata file reside?:option - Upload the
sp.xmlfile - Ignore the second option for uploading a file or URL, leave it blank
- Click
'Ok
- Change Realm to
- Click on the
sbaclink within theCircle of Trustsection of the page - Click the
Add >button to move the newly createdthssitem to theSelectedlist - Click
Save
